Error message

  • Notice: Trying to access array offset on value of type int in element_children() (line 6609 of /home/qrcadojra8us/addon_domains/kstoneltd.co.uk/includes/common.inc).
  • Notice: Trying to access array offset on value of type int in element_children() (line 6609 of /home/qrcadojra8us/addon_domains/kstoneltd.co.uk/includes/common.inc).
  • Notice: Trying to access array offset on value of type int in element_children() (line 6609 of /home/qrcadojra8us/addon_domains/kstoneltd.co.uk/includes/common.inc).
  • Deprecated function: implode(): Passing glue string after array is deprecated. Swap the parameters in drupal_get_feeds() (line 394 of /home/qrcadojra8us/addon_domains/kstoneltd.co.uk/includes/common.inc).

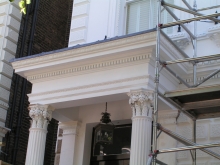
Portico Restoration

This project has been given to us as trusted sub-contractors by Pierra Restoration Ltd. who were the owner of the contract and managed the overall restoration of the building. Our input was solely craftsmanship and experience in stuco restoration.

Key point in this project was the recreation of the unique ornamental pattern for which an exact replacement is not available.
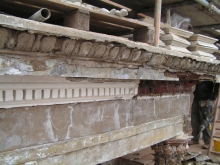
Necessary repairs to damaged portico ornaments Necessary repairs to damaged portico ornaments

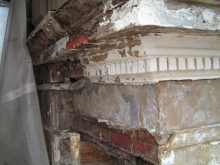
Prior comencing of the work, every detail of the portico had been throughly measured, the least damaged ornament sections was carefully removed and sent to specialist to form a mould and make new pre-cast units. The existing stuco render and all details were damaged beyond repair, therefore the only option was to trip everything down to a bare wall and rebuilt it.


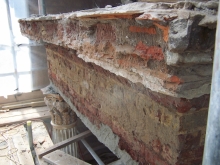
First stage: remove loose and damaged stone, brick and mortar Cracks were deep and the damage was spread within the brickwork as well. All damaged sections of the render and brickwork was removed and fully rebuilt. A steel bar between the capitels on the front column required cleaning and treatment with red oxide to stop further deterioration.


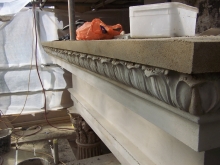
A two-coat render (backing and finishing) had been applied to prepare the surface for the installation of the new pre-cast ornaments.

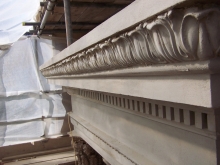
The pre-cast ornaments were resin fixed to the wall with 170mm long stainelss steel dowels to ensure maximum bonding.

Thickness of the dowels was chosen to be 6mm for the top details (tongue and leave) of the cornice, and 8mm for the heavier (dental) units of the bottom of the cornice.
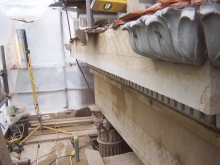
Stage two: Rebuild the structure with added reinforcement. Stage three: Attach pre-cast ornaments and restore sill.


Stage four: Apply mortat ro finalize the cornice Final stage: Prime and paint


Add new comment

Plain text

  • No HTML tags allowed.
  • Web page addresses and e-mail addresses turn into links automatically.
  • Lines and paragraphs break automatically.
  • Allowed HTML tags: <a> <em> <strong> <cite> <blockquote> <code> <ul> <ol> <li> <dl> <dt> <dd> <p> <br>
CAPTCHA
This question is for testing whether or not you are a human visitor and to prevent automated spam submissions.
By submitting this form, you accept the Mollom privacy policy.